
Testing a gasketed plate heat exchanger: a photo guide
A point-by-point guide to plate inspection, dye-penetrant testing and documented verification. For single-plate gasketed designs only, not semi-welded units.
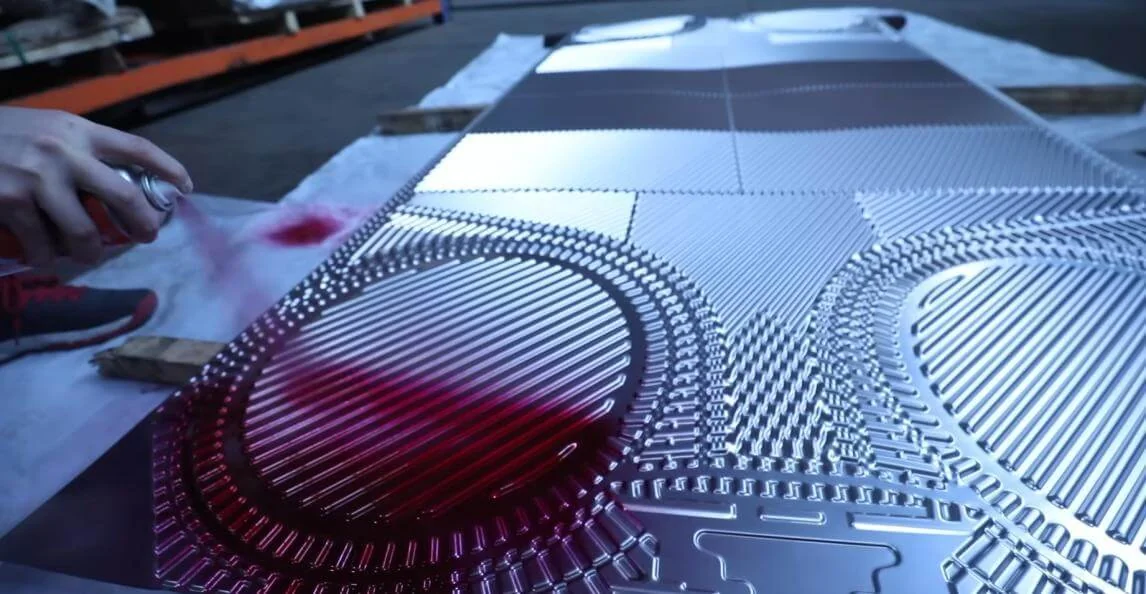
Use this guide to understand and plan an inspection with a qualified service team. Dye-penetrant (DP) inspection looks for surface-breaking indications on accessible individual plates. It is not a pressure test, and an absence of visible indications does not by itself prove complete leak-tightness or fitness for service.
01. Confirm scope and prepare safely
- Record the model, serial number, plate arrangement, process fluids and service history.
- Agree the inspection coverage, acceptance criteria and test procedure with the responsible engineering team.
- Arrange isolation, depressurisation, draining and cooling under the site permit system. Qualified personnel must confirm safe access before work begins.
- Review chemical safety data, compatible consumables, ventilation, protective equipment and waste handling.
02. Plan any preliminary leak check
- Treat an assembled-unit leak or hydrostatic check as a separate, controlled activity from DP inspection.
- Use only the manufacturer-approved test medium, pressure, differential-pressure limit, duration and connection arrangement for the particular unit.
- Record observations for comparison with the individual-plate inspection. Do not infer a safe test pressure from this article or the operating pressure alone.
03. Open, identify and visually inspect
- The service team opens the unit following its specified sequence and handling instructions.
- Maintain plate identification and original order so every finding can be traced to a plate position.
- Record fouling, deformation, corrosion and gasket condition; identify suspect plates without losing their original position.
04. Clean and dry the inspection surface
- Remove contamination using the approved cleaning method so it does not mask an indication.
- Allow the surface to dry as required by the selected penetrant system.
- Do not treat the reference photo's consumable as mandatory for every plate material or application.
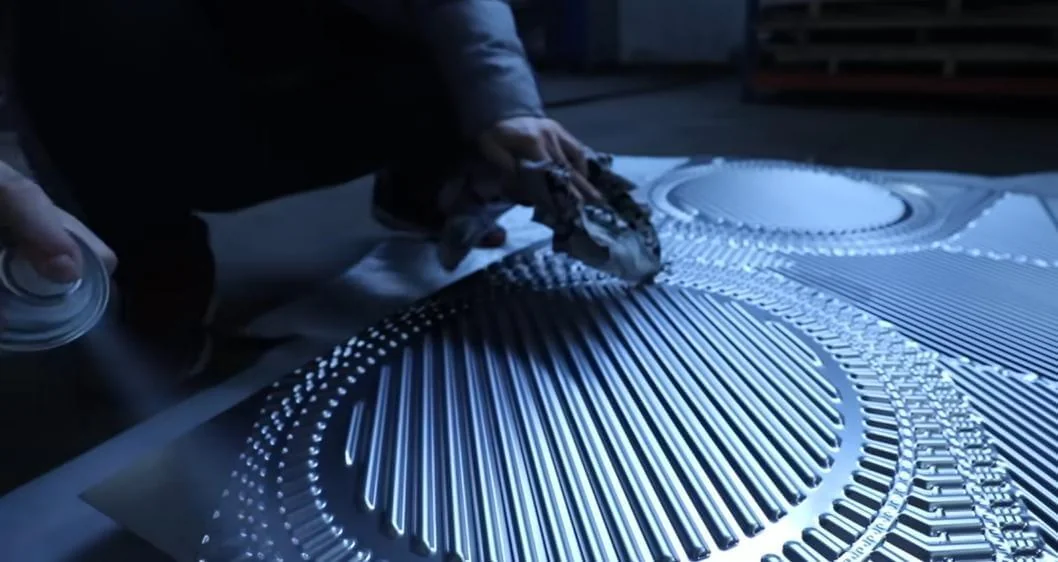
05. Apply penetrant and control dwell time
- Apply the approved visible penetrant to the inspection area under the written test procedure.
- Record the application time and maintain the required dwell conditions.
- The supplied references show different dwell-time examples. The approved procedure and consumable instructions determine the actual timing, not a universal value from this guide.
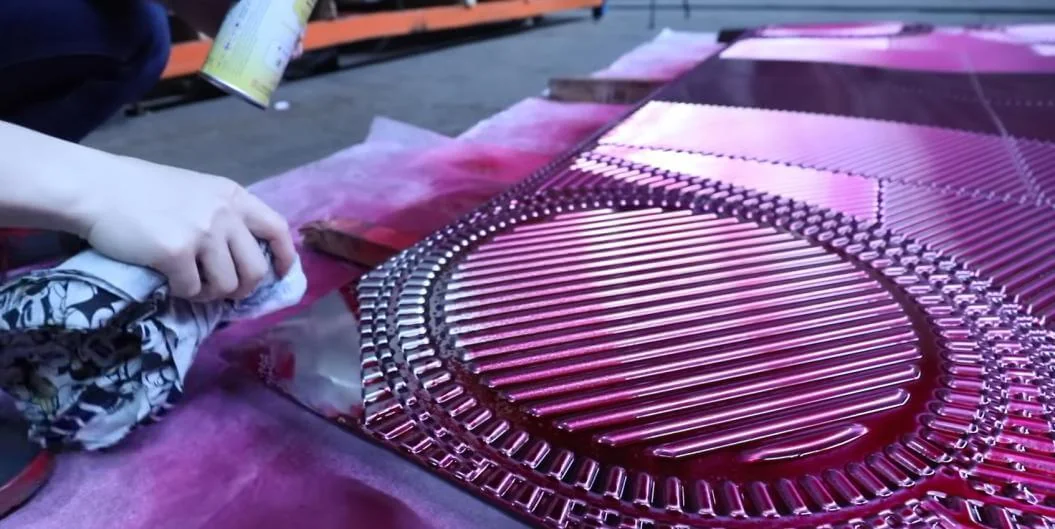
06. Remove excess surface penetrant
- After the specified dwell, remove excess penetrant using the method approved for that penetrant system.
- Avoid a removal process that washes penetrant out of discontinuities and reduces detection sensitivity.
- Check surface condition before proceeding to the developer stage.
07. Apply developer and allow development
- Apply developer in the manner and coating thickness required by the approved inspection procedure.
- Allow the specified development time before evaluation.
- Control viewing conditions and timing; an overly heavy coating can make interpretation more difficult.
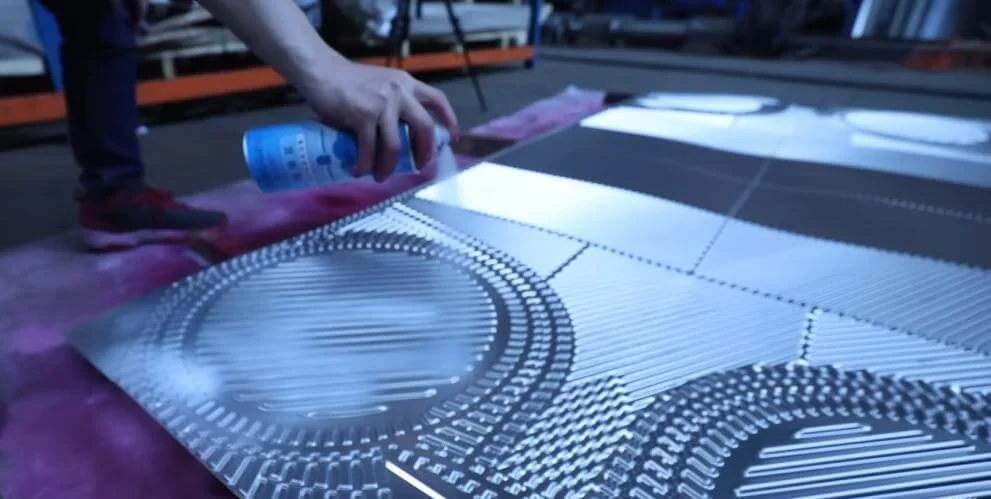
08. Evaluate and photograph indications
- A qualified inspector evaluates indications against the agreed acceptance criteria.
- Record plate position, indication location, observations and clear photographs. Distinguish relevant indications from background or non-relevant marks.
- Red bleed-out requires evaluation; it is not automatically proof of a crack. No visible indication is not a guarantee that all possible leakage paths have been ruled out.

09. Clean, assess gaskets and reassemble
- Complete post-test cleaning and drying appropriate to the process, including hygiene requirements before returning product-contact surfaces to use.
- Inspect gasket condition, grooves, frame, guide bars and tightening components; agree replacement needs.
- Reassemble only accepted components in the approved plate sequence and close to the unit-specific dimension. Do not substitute a generic torque or closing value.
10. Verify and document the outcome
- Carry out the agreed final leak or hydrostatic verification under the approved unit-specific test plan.
- Compile the inspection scope, procedure, consumables, timings, plate identification, photographs, results and limitations.
- Record repairs or replacements, recommendations and the responsible team's return-to-service approval.
- Send DFT your equipment details and intended shutdown window to discuss an inspection scope; this article does not promise certification or a fixed completion time.
Prepared from DFT's supplied DP Test Procedure and project inspection proposal. Photos are reference illustrations, not a record of testing the reader's equipment. Customer-specific identifiers and commercial estimates have been omitted. This educational overview is not an approved work instruction, certification or substitute for the applicable equipment manual.
Further reading
Discuss your application
Share your process conditions and equipment requirements with Delta Flow Tech.
Ask DFT about thisContinue reading
Why a plate heat exchanger misses its target temperature
Separate a changing process duty from fouling or a flow problem before deciding that the exchanger needs more plates.
Learn moreSteam traps: selecting the duty and planning a useful survey
Assess the complete condensate path, then use a consistent survey to distinguish normal operation from leakage or restricted drainage.
Learn more